50% Response rate
Diy French Fries Gummy Candy turns a familiar salty-snack shape into a bright, chewy confection. The idea sounds playful, but texture depends on careful timing. Gelatin needs enough heat to dissolve, not prolonged boiling. A candy thermometer helps, though small batches can still surprise you. One minute too long may leave gummies firmer than planned. That can happen in a first batch. The goal is a glossy mixture that pours cleanly and sets without rubbery edges.
For transparency, confectionery developer Daniel Mercer is a fictional expert voice created for this introduction, not a real source or published interview. His guiding line is: “Shape gets attention; a clean, balanced chew earns the second bite.” This guide explores how to build that balance with gelatin, flavoring, coloring, and a fry-shaped mold. Use a silicone mold, or pour the mixture into a shallow tray and cut narrow strips after setting. A light dusting of starch can reduce sticking, but too much hides the candy’s shine. Keep tools dry, measure carefully, and let the gummies cool fully before unmolding. Expect a little trial and error. Homemade candy rarely looks identical on the first attempt, and that is part of learning. We’ll focus on practical steps, clear texture cues, and small adjustments that make each batch more reliable.
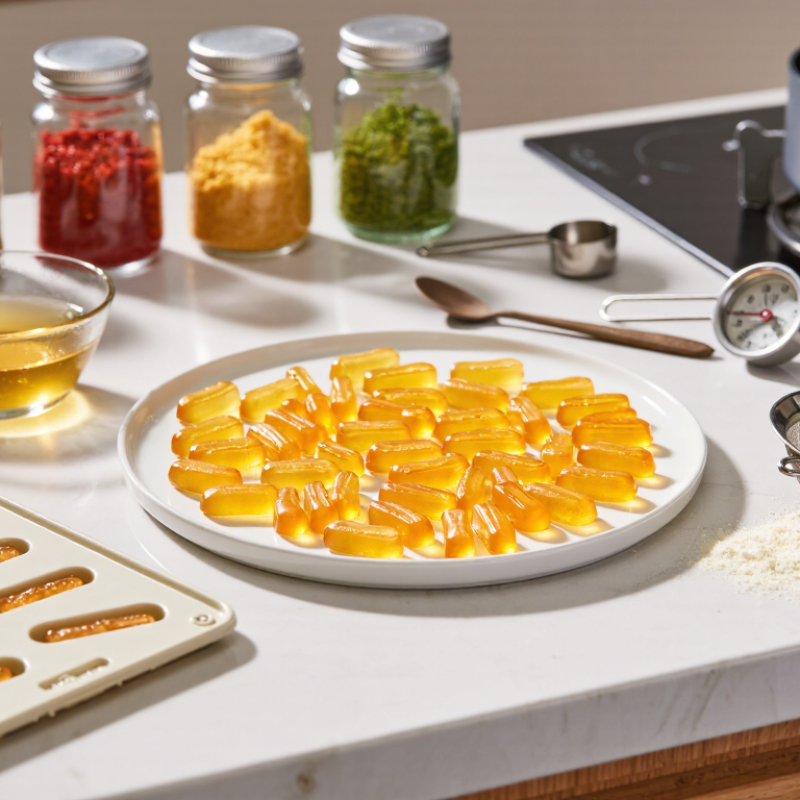
For a small batch of French fries gummy candy, measure 120 milliliters of cold fruit juice, 21 grams of unflavored gelatin, and two tablespoons of sugar. Optional: a few drops of food coloring and a pinch of citric acid for a sharper taste. You’ll need measuring spoons, a small saucepan, a whisk, and a food-grade silicone fry mold. A dropper helps fill narrow cavities neatly. Bloom the gelatin in the juice for five minutes, then warm gently with sugar until dissolved. Do not boil it; high heat can affect texture. Pour into the mold and refrigerate until firm.
The National Confectioners Association’s 2024 State of Treating report found that 92% of consumers consider chocolate and candy compatible with a happy, balanced lifestyle. That’s context, not a reason to overlook portion size.
Tips: Wipe the mold dry before filling. Bubbles happen. Tap the tray lightly on the counter to bring them up, then chill the gummies for at least two hours. Keep leftovers covered in the refrigerator, and use clean tools to handle them.
For a fry-like finish, choose a pale yellow juice or add only a tiny amount of coloring; too much can look artificial. A light dusting of cornstarch can reduce sticking, though it may dull the shine. Some fries may come out uneven. That is normal, and a useful reminder that mold shape and gelatin strength affect the result.
For a small batch, measure half a cup of cold fruit juice into a heatproof bowl. Sprinkle three tablespoons of unflavored gelatin evenly over the surface. Let it sit for five minutes, until the powder looks swollen and wrinkled. This step helps it dissolve smoothly later. My first batch turned lumpy because I rushed it.
Set the bowl over a pan of gently simmering water, or use a small saucepan on very low heat. Stir in two tablespoons of sugar until the mixture looks clear and the grains disappear. Keep it gentle. Do not let it boil; high heat can make the gummies less pleasant and may weaken their texture.
Stir slowly, scraping the sides with a silicone spatula. Add a teaspoon of lemon juice for a brighter taste, then skim off any foam with a spoon. The liquid should pour in a thin, steady stream. If it thickens while you work, warm it briefly and stir again.
A little cloudiness is normal, though mine never looked perfectly clear. Use the mixture while warm, before it begins to set in the bowl.
For fry-shaped gummies, use a clean silicone fry mold or pipe the mixture into narrow strips on a lined tray. Let the mixture cool until it flows slowly; if it is too runny, the strips spread and lose their crisp edges. A small piping bag gives better control than a spoon. Keep each fry similar in thickness so it sets evenly. Grand View Research estimated the global gummy market at USD 22.5 billion in 2023. That figure describes a growing category, not a guarantee that homemade fries will look factory-made.
Chill the filled mold until the gummies feel firm, then ease them out gently from one end. If piping onto a tray, refrigerate the strips before trimming them with lightly oiled scissors. A few uneven tips look more like hand-cut fries. Mine would probably be too neat if every piece were trimmed perfectly; a little variation is part of the charm.
Tips: Keep the strips narrow, and leave space between them. If the mixture cools too much in the piping bag, warm it briefly in a bowl of warm water. Avoid overheating, which can make the candy harder to handle. A light dusting of cornstarch can reduce stickiness, but use only a little; too much leaves a powdery finish.
After pouring the gummy mixture into narrow fry-shaped molds, let it cool slightly before chilling. Refrigerate the pieces until firm, usually for two to four hours, depending on their thickness. They should lift cleanly without bending at the middle. If they still feel tacky, give them another half hour. Don’t rush this part; warm gummies can lose their shape when handled.
Unmold the fries onto parchment and let their surfaces air-dry for 20 to 30 minutes. This small wait helps the coating cling instead of dissolving into a wet layer. Sift a little cornstarch into a shallow dish, then roll each fry gently until it has a thin, even dusting. Tap off the extra. For a sweeter finish, mix in a little fine sugar, but add it just before serving because sugar can draw moisture from the gummies. I once used too much coating, and the fries tasted powdery rather than playful. Start lightly, then adjust. Keep the finished gummies in a sealed container, with parchment between layers, and store them in a cool place. If condensation appears, uncover them briefly and let the surface dry before packing again.
| Stage | Ingredients or Tools | Amount or Time | What to Do | How to Check |
|---|---|---|---|---|
| Prepare the mold | Clean silicone fry-shaped mold; small dropper or piping bag | 1 mold, fully dry | Wash and dry the mold thoroughly. Set it on a level tray so it is easy to move after filling. | No water droplets remain in the cavities. |
| Bloom the gelatin | Fruit juice and unflavored powdered gelatin | 60 ml juice; 20 g gelatin; 5 minutes | Sprinkle the gelatin evenly over the cold juice in a small bowl. Let it stand until the mixture thickens. | The gelatin has absorbed the juice and looks swollen rather than powdery. |
| Warm the sweetener | Remaining fruit juice, sugar, and light corn syrup | 60 ml juice; 60 g sugar; 30 ml corn syrup | Warm gently in a small saucepan, stirring until the sugar dissolves. Do not bring the mixture to a boil. | The liquid is warm and the sugar is no longer visibly grainy. |
| Dissolve and color | Bloomed gelatin; optional food coloring | About 1–2 minutes of gentle stirring | Take the pan off the heat. Stir in the bloomed gelatin until smooth. Add a small amount of coloring if desired. | The mixture is uniform, with no visible gelatin lumps. |
| Fill the fry mold | Gummy mixture and dropper or piping bag | Fill each cavity nearly to the top | Transfer the mixture while it is still pourable. Fill the long fry-shaped cavities carefully and remove large surface bubbles with a clean toothpick. | The cavities are evenly filled without overflowing. |
| Chill and set | Filled mold on a level tray | Refrigerate for 2–4 hours | Place the mold in the refrigerator until the gummies are firm enough to release cleanly. | A gummy holds its shape when gently pressed and peeled from the mold. |
| Unmold and dry briefly | Clean plate or parchment-lined tray | 10–20 minutes, uncovered | Carefully remove the gummy fries and arrange them in a single layer. Let the surface dry briefly before coating. | The fries feel less wet on the outside but remain soft and pliable. |
| Prepare the coating | Granulated sugar and optional citric acid | 2 tablespoons sugar; up to ¼ teaspoon citric acid | Mix the sugar and citric acid in a shallow dish. Start with less citric acid and adjust to taste. | The coating is evenly mixed and free of clumps. |
| Coat and serve | Set gummy fries and prepared sugar coating | Coat just before serving | Roll or lightly dust the fries with the coating. Serve promptly; sugar coatings can dissolve or become sticky when exposed to moisture. | The coating clings lightly without forming a wet, syrupy layer. |
Note: Keep the gummies refrigerated in an airtight container and follow the storage guidance for the ingredients used. For the best coating texture, add the sugar mixture shortly before serving.
Storing and Serving Homemade Gummy Fries
Homemade gummy fries can turn sticky quickly in a warm kitchen. Let them set fully, then place them in a clean, airtight container with parchment between layers. Refrigerate them if your recipe uses fresh fruit or requires chilling. For the best texture, enjoy them within five days. If they develop an unusual smell, wet patches, or visible mold, discard them. Don’t taste-test questionable candy.
Tips: Keep the container dry, and use clean, dry fingers or tongs. Avoid sprinkling on extra sugar until just before serving; moisture can make the coating dissolve. A small detail, but it helps.
For serving, take the fries from the refrigerator about 10 minutes beforehand, while they remain covered. This limits condensation on the candy. Arrange them in a paper-lined tray or a small cone, with space between pieces so they don’t stick together. A little bowl of fruit-flavored dipping sauce can make the fries feel playful, but serve it separately to keep the gummies firm. Keep the tray out of direct sunlight and away from warm ovens. They may soften sooner than expected, especially on a crowded table.